
operating system come from the GNU project; hence the names: GNU/Linux and GNU/Hurd. These tools are also free. Of course, the thing that people want is application software: programs to help them get what they want to do done, from editing documents to running a business to playing games to writing more software. Debian comes with over 29000 packages (precompiled software that is bundled up in a nice format for easy installation on your machine) — all of it free. It's a bit like a tower. At the base is the kernel. On top of that are all the basic tools. Next is all the software that you run on the computer. At the top of the tower is Debian — carefully organizing and fitting everything so it all works together.
Dikutip dari : http://www.debian.org
- Pastikan settingan Booting pertama pada komputer adalah CD/DVD ROM.
- Setelah itu masukan CD/DVD Linux Debian Lenny 5.0 jika belum punya silakan download di http://kambing.ui.ac.id/
- Lalu pada pilihan selanjutnya kita harus memilih Mode Instalasinya , Mode Instalasinya ada dua macam yaitu Mode Instalasi Berbasis Text dan Mode Instalasi Berbasis GUI (Graphical User Interface) disini kita akan memilih Graphical Install karna akan menginstall Berbasis GUI

- Pada tampilan selanjutnya memilih bahasa untuk instalasi , pilih English

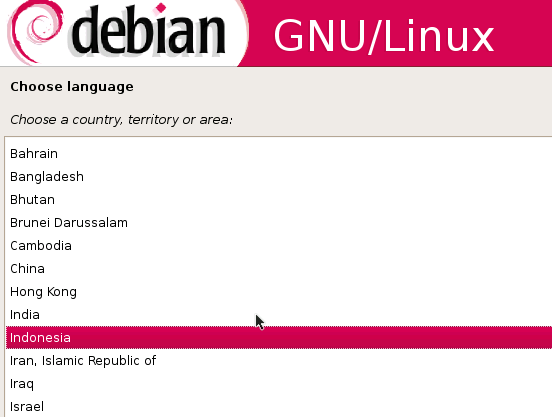
- Pada tampilan Choose a country, teritorry or area pilih Other

- Pada pilihan Choose a continent or region pilih Asia

- Setelah itu pilih Indonesia
- Lalu memilih jenis Keyboard yang kamu gunakan defaultnya adalah QWERTY/US , pilih American English

- Pada Configure your network pilih Cancel (karna kita akan konfigurasi secara manual)

- Pada tampilan Network Configuration Method pilih Configure Network Manually

- Setelah itu kamu isikan ip address komputer misalnya 192.168.1.1

- Lalu isikan Subnetmask 255.255.255.0

- Setelah itu isikan ip yang sama untuk Gateway 192.168.1.1

- Lalu kamu isi lagi dengan ip yang sama pada Name Server Addresses

- Pada tampilan selanjutnya kamu ganti Hostname sesuka kamu misalnya server , kalau tidak biarkan saja lalu pilih Continue

- Setelah itu isikan Domain Name misalnya Belajar.com lalu Enter

- Pada Configure the clock sesuaikan dengan daerah tempat tinggal kamu dan tekan Enter

- Pada bagian pembuatan partisi Hardisk pilih Manual

- Setelah itu tekan Enter pada Hardisk yang terbaca

- Pilih YES pada Create new empty partition table on this device

- Tekan Enter pada FREE SPACE

- Lalu pilih Create New Partition

- Ganti partisinya menjadi 1 GB (1GB adalah kelipatan dari memori komputer jika memory komputer kamu 256 MB maka isikan 512 MB sekarang kita akan membuat partisi untuk SWAP, Partisi SWAP adalah Virtual Memory di LINUX )

- Pilih Primary lalu Enter

- Lalu pilih Begining dan Enter

- Lalu pada Partition Setting tekan Enter pada Use as:

- Dan pilih Swap Area dan tekan Enter

- Lalu tekan Enter pada Bootable Flag

- Setelah itu pilih Done setting up the partition

- Lalu pilih lagi FREE SPACE

- Pilih Create new partition

- Lalu ketikan jumlah partisi

- Lalu setelah itu pilih Logical

- Kemudian pilih Done Setting Up The Partition

- Lalu pilih Finish Partitioning and write changes to disk

- Pilih YES pada Write The Change To Disk

- Tunggu sampai selesai

- Lalu masukan password untuk ROOT (ROOT adalah Account super user di linux , dengan Acount ini kamu bisa melakukan apa saja)

- Setelah itu isi dengan nama kamu

- Setelah itu isi lagi dengan nama kamu

- Setelah itu isikan password untuk user yang tadi baru kamu buat

- Pilih NO pada Scan Another CD or DVD

- Pilih NO lagi pada Use a Netword Mirror

- Pilih lagi NO pada Participate in the package usage survey

- Setelah itu pilih paket - paket yang akan di install yaitu Web Server , DNS Server , Mail Server dan Standard System (untuk memilih paket tekan Spasi)

- Setelah itu tunggu sampai penginstalan paket yang dipilih selesai

- Setelah itu pilih YES pada Install the GRUB Boot Loader ... (Boot Loader adalah kelebihan System Linux untuk membuat pilihan Sistem Operasi komputer jika komputer mempunyai 2 Sistem Operasi)

- Setelah itu pilih Continue untuk menyelesaikan Instalasi Linux Debian Lenny 5.0

- Setelah itu akan muncul GRUB Boot Loader Linux disini kita pilih yang pertama (Karna pilihan pertama kita akan login dengan mode Full Version sedangkan yang kedua hanya untuk login single user mode)

- Setelah itu login dengan user ROOT

- SELESAI , SEMOGA BERMANFAAT


0 komentar:
Posting Komentar